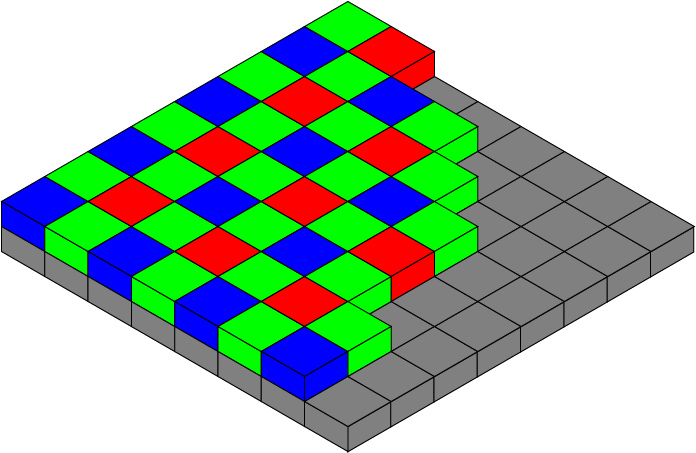
In my previous post, I discussed how camera sensors capture light and how the processor then compresses this information, before writing it to your digital media. Now it’s time to talk about the simple steps you can take to make sure these processes don’t negatively impact on your final output.
Log Isn’t Always the Answer
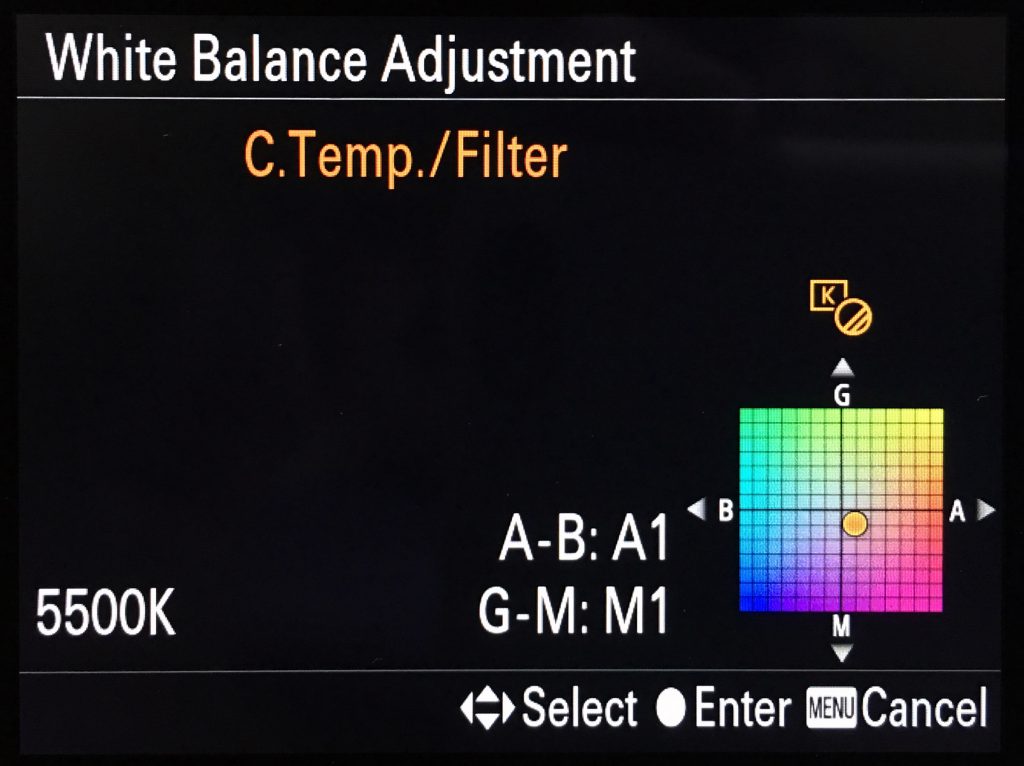
So, here’s a real life scenario for you. You’re shooting with an A7Sii, using the S-log3 picture profile, it’s daylight and your white balance is set to 5500K (more on this later). You get back after the shoot and stretch your contrast out, to stop it looking so grey, then you add in a ton of saturation, to stop it looking washed out, then you notice the white balance is a bit off, so you balance that out. That’s three corrections, before you’re even at neutral, that you’ve performed on a clip that started out with the smallest amount of colour information you can get with a video file (8-bit) and was then de-bayered, sub-sampled, spatially compressed….hopefully you get my point! So, how can you maximise your signal to create the best final images possible? Well, let’s go back to my real life scenario. First off, can you use a different camera or at least bypass its internal codec? If you can shoot into a codec that is 4:2:2 and 10-bit, it would give you a much more robust signal and lots more flexibility further down the line. Next, do you have to shoot it log? Many self-shooters and cinematographers default to shooting in log for everything, on every project, because they think it is maximising their image quality or giving them more data to play with.
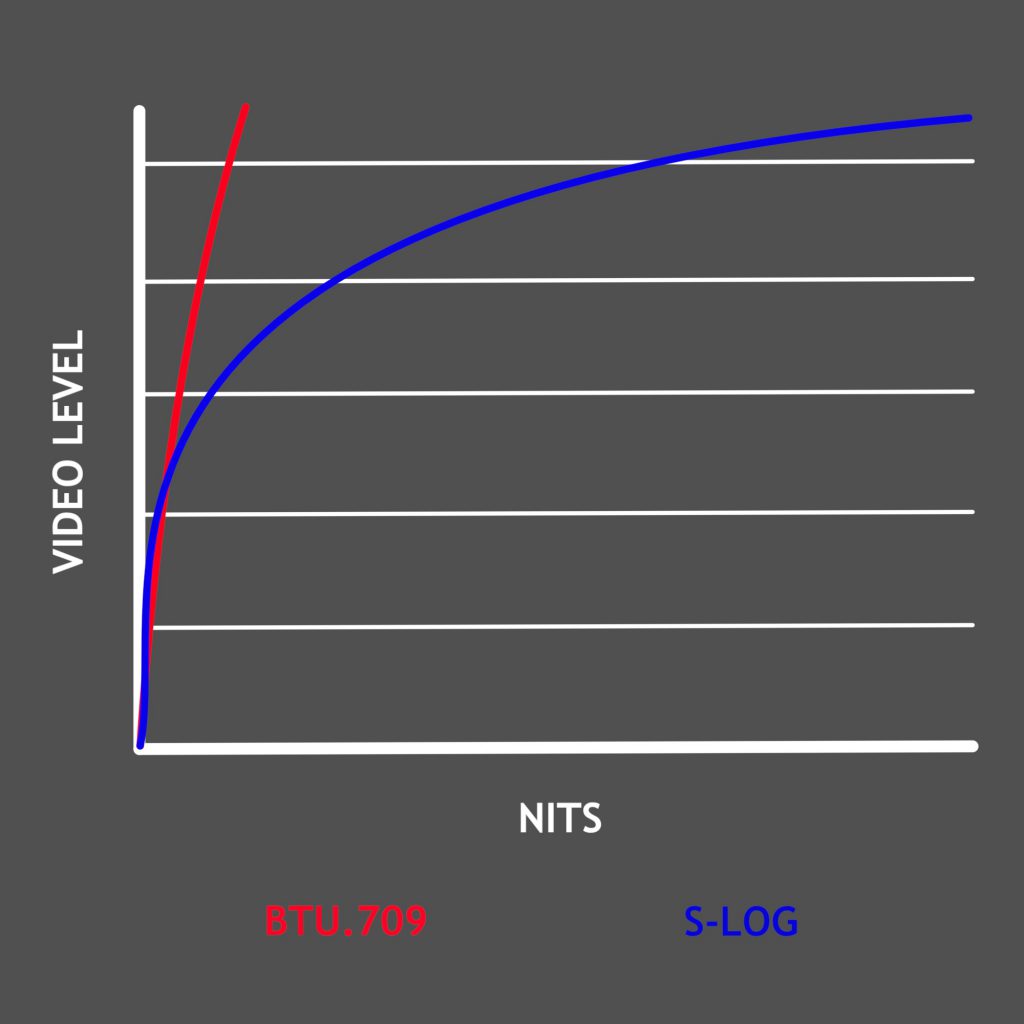
The reality is, logarithmic gamma curves have one purpose in life – to compress a high dynamic range scene in to a standard dynamic range format. If all our screens and TVs were HDR capable and every camera shot natively in to 12-bit codecs, we wouldn’t have the need for such extreme logarithmic gamma curves. But we don’t, so until that time, if you have a scene with a large dynamic range, with details you want to keep in the highlights, then you will want to shoot log. But what are the chances that everything you ever shoot has a high dynamic range? I know I don’t, so why would I use such an aggressive compression technique (that is ultimately what log is, after all) to shoot a scene with normal or low dynamic range? If you want to maximise the quality of your signal, make sure you use a gamma profile that is appropriate to your scene and, yes, that does mean changing profiles several times during your shoot and that is absolutely fine, as you were going to have to grade it any way. You will then not have to push it so far in post to get to what you want. Finally, make sure you white balance properly. In my example above, the camera was set to 5500K in the mistaken belief that that is always the colour temperature of daylight. This is one of the most persistent myths in digital cinematography. 5500K is the average colour temperature in Los Angeles and it was this temperature that was chosen for daylight fixtures due to Hollywood being the light manufacturers biggest market. In northern Europe, the average colour temperature of daylight is around 6500K, which is why that was chosen as the white reference point for the colour space that is defined by Rec.709, as the scientists who’s work laid the foundations for broadcast transmission were from northern Europe. In reality, the temperature of daylight is constantly shifting and could be many hundreds of Kelvin either side of 6000K, so use a proper, spectrally-flat, grey card on your shoots, to ensure a correct white balance. That way, you can avoid another round of destructive colour correction on your hard-won footage.
Conclusion
Follow these steps to get the best quality images out of your digital camera so you don’t have to push your signal around in post:
- White balance properly in camera, using a spectrally-flat white balance card.
- Choose an appropriate gamma profile for the scene you’re shooting; don’t just shoot everything log, all the time.
- Record using the highest quality codec you can and give yourself the most colour information to work with in post.
By fully understanding the strengths and weaknesses of your camera’s codec, the in-camera processes that may take place to compress your image, the potential pit falls of using an inappropriate gamma profile and the techniques you can use on set to correctly white balance and expose your footage, you can produce the best looking films of your career. You’ll also discover a new level of confidence with your colour work because you’ll be free to make uncompromising changes that serve your story and your vision, with none of the artefacts, banding and noise that you may have thought previously were unavoidable.
** CFA illustration from https://en.wikipedia.org/wiki/Color_filter_array
All other images are © Korro 2016
Hello – could you clarify something – towards the end of the article, you reference the use of a ” spectrally-flat, grey card on your shoots” and then in the conclusion you say “White balance properly in camera, using a spectrally-flat white balance card”.
So which is it? A white card or a grey card? I’m assuming a white card, as a grey card would only allow you adjust in post.
Otherwise a very sensible argument for a different approach to image capture. Thanks
Hi Jason.
Sorry for the confusion and thanks for your question. It is just a matter of semantics, as a “white balance card” (a card designed for white balancing from) is normally light grey. I was not meaning a white card.
Grey is used for white balancing because (in most cameras) the minimum amount of signal compression occurs in the middle tonal range, so the camera can make a much more accurate reading from that region, compared to white, where the gamma curve compresses the signal more and it’s more likely that one or more of your channels could be clipped.
The key thing is that your white balance target is spectrally flat, reflecting all the frequencies of the light hitting it, and that you white balance in camera. I wouldn’t advise using a white picker in post to fix white balance, due to the compression that occurs in camera, as discussed in the article.
Hope that clears things up for you.