
Introduction to Camera Color Matching, by Ollie Kenchington
One of the most common questions I get asked is about matching two or more cameras together in post. Colors can vary, even when all cameras are set to the same color temperature, and contrast can also differ significantly, particularly when mismatched camera profiles are used.
If you’re an event shooter or documentary filmmaker, you’re likely to have footage from multiple cameras that you will want to look as similar as possible to each other in your edit. In my case, this is most often B-cam footage from a second interview angle. In situations like that, it would be distracting to have colors and contrast shifting as you cut back and forth. In this tutorial, Iʼm going to show you the process I use for matching multiple cameras.
Before Shooting
The importance of understanding your cameras various image profiles cannot be overstated. Simply always using one profile and doggedly trying to get everything else to match to it is not good enough. You need to not only understand which profiles will give you the best results, in each given set up, you also need to be able to quantify those differences, in terms of tonality and color reproduction. The easiest way to do this is to shoot test scenes, ideally a fixed test set up that you can easily recreate, or leave set up in your studio, to be your go-to reference.
If you shoot the same subject, under the same lighting conditions, with varying picture profiles, you will be able to use your video scopes (see my previous article about how to use these here) to ascertain how the image is changing with each different profile. If you are hiring in a new camera you have not used before, I would highly recommend you factor in an additional day (at least) before the shoot, to have time to play with the camera, shoot tests and learn the menus. Every camera has a unique color science and individual strengths/weaknesses and if you hope to match multiple cameras, youʼll need to learn what these quirks are and how they affect the look of each angle you plan to use. If that sounds daunting, be thankful youʼre not a GP or lawyer 😉
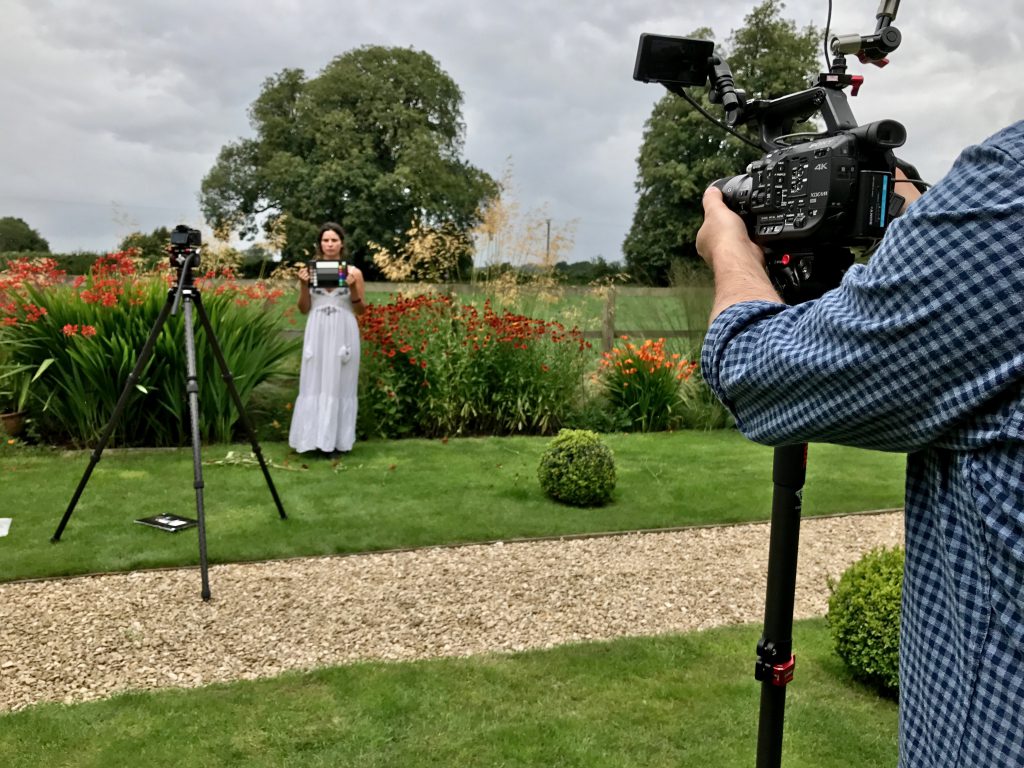
On the Shoot
Now this bit is crucial, for more than just matching cameras too. You must not leave it all up to your colorist to sort out color and contrast irregularities in post. Thereʼs only so much they can do, their time is costly and it might be that you are shooting into a low bit depth and/or chroma subsampled codec (read more about this here) and there just wonʼt be enough data available to iron out all the irregularities. The two biggest things you can do in-camera to get ahead of the game are a manual white balance and to expose correctly.
How to white balance your footage correctly
Tip one – do not dial in a Kelvin based on a guess. If for example, you think daylight is always 5600K, then you need to stop dialing in Kelvin to set your white balance!
Tip two – do not manually white balance using a white piece of paper, or white wall. Pigments in the paper/wall (that your eye will not be able to detect) will absorb some frequencies of the light that hit it and therefore not reflect them back, towards your camera. So you will end up sampling from something that isnʼt representative of the light hitting your subject.
Instead, you should manually sample (using the WB SET button on the front/ side of your camera) using a spectrally flat (pigment free) gray card. Because the card reflects ALL the frequencies of the light hitting it back at your camera sensor, you will get a more accurate measurement. Also, because it is gray, the sensor is reading from the most useful part of its sensitivity range (where skin tones exist, for example) and also an area where there will be very little chance of R, G or B channel clipping. These white balance charts are available from various manufacturers for not much money, given their usefulness. I use the Color Checker Video from X-Rite, which also has a color/contrast side for helping with the next part…
Setting exposure
If you under-expose, or over-expose, you are going to create an image that is missing data altogether, meaning no amount of manipulation in post is going to make it match another, properly exposed camera.
Exposure is attained by controlling one or more of the following: aperture/iris, shutter speed, sensitivity (dB/ISO) or the light source itself. This isnʼt the time to go into detail about setting exposure generally but suffice to say that if you have a well-exposed image, you will stand a far greater chance of matching it to another camera. Using 90% reflectance white cards during the shoot and recording skin tone/contrast references will help you get exposure right in-camera, which is why I use these charts on all my shoots.
In Post
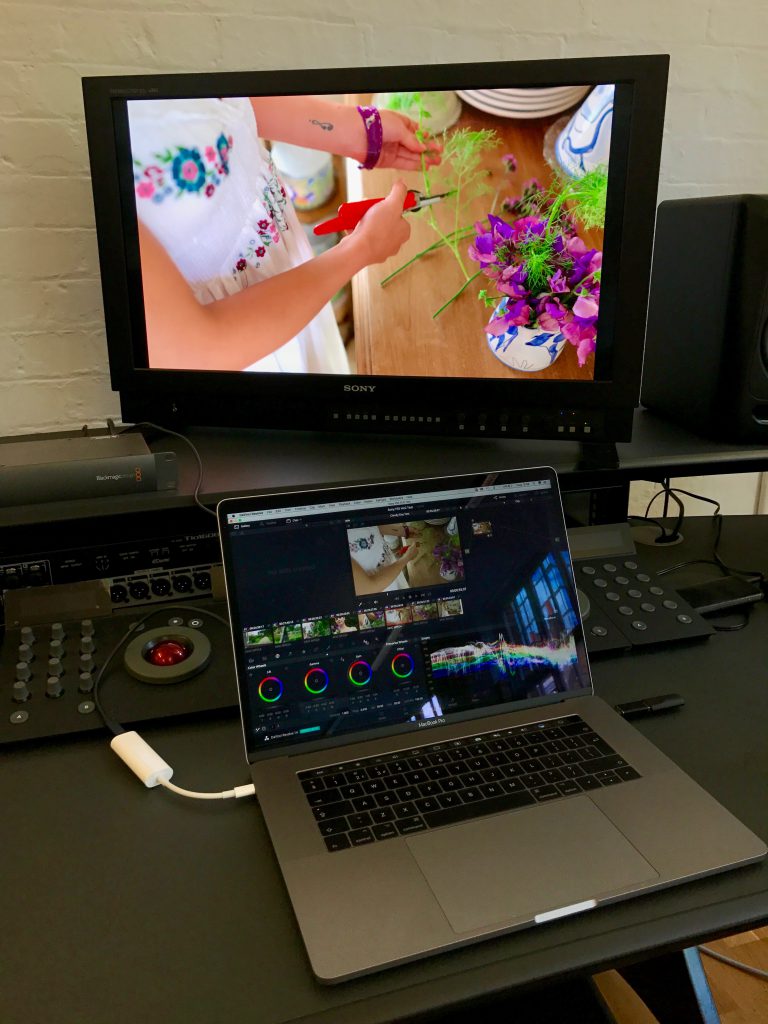
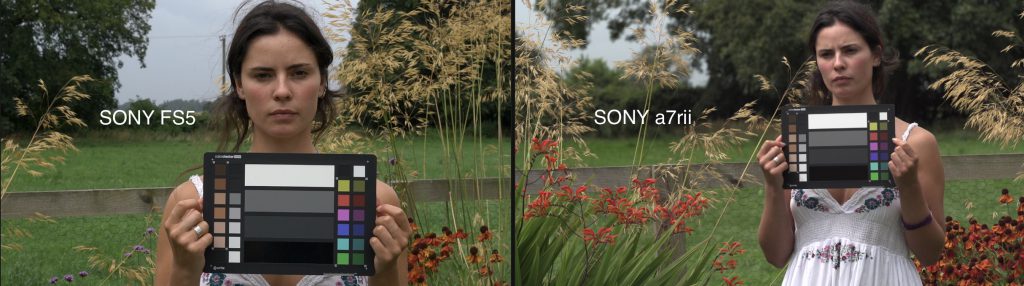
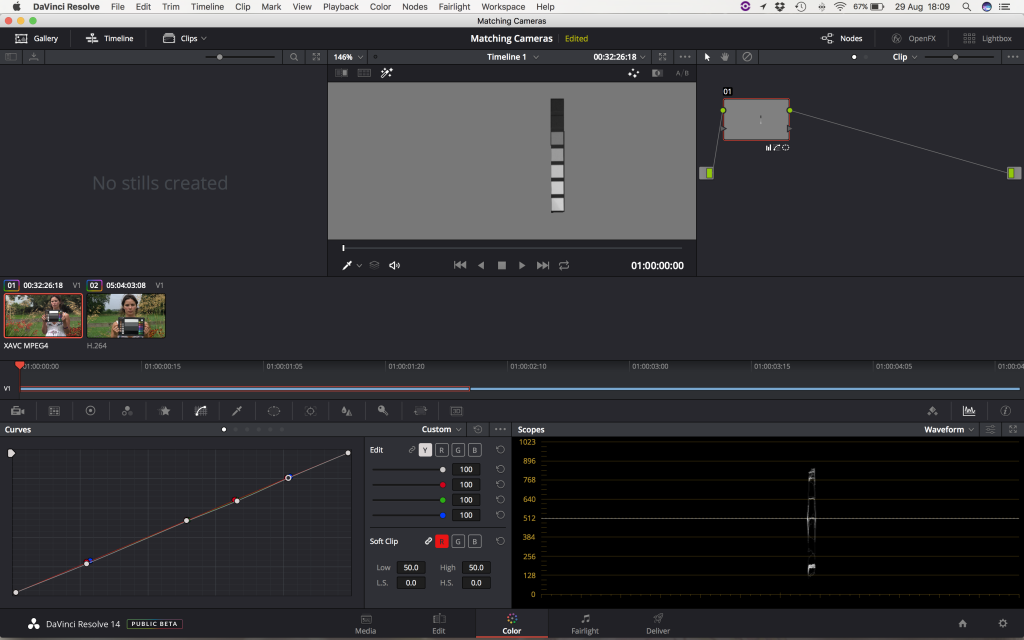
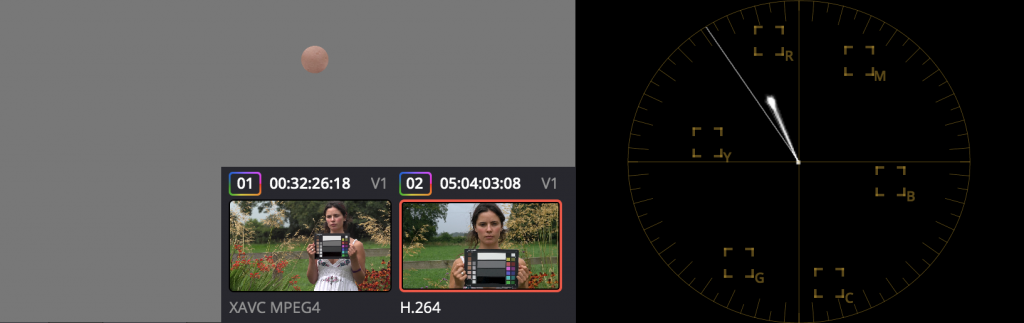
Take your recorded chart clip into a software package that allows fine adjustments to color and contrast curves. I use Blackmagicʼs DaVinci Resolve for this because it has all the tools necessary to make these adjustments quickly and accurately. In the example Iʼm using, I shot our model with a Sony A7RII and a Sony FS5, whilst she held my Color Checker Video chart.
As per my advice above, I chose two profiles that matched fairly closely in-camera. I then used zebras to make sure the 90% reflectance chip fell at the same IRE on both cameras. Finally, I did a manual white balance using the gray side of the chart. As you can see, this resulted in two images that were already very similar, but there is still a clear mismatch in skin tone (the A7RII footage is much more yellow than the FS5).
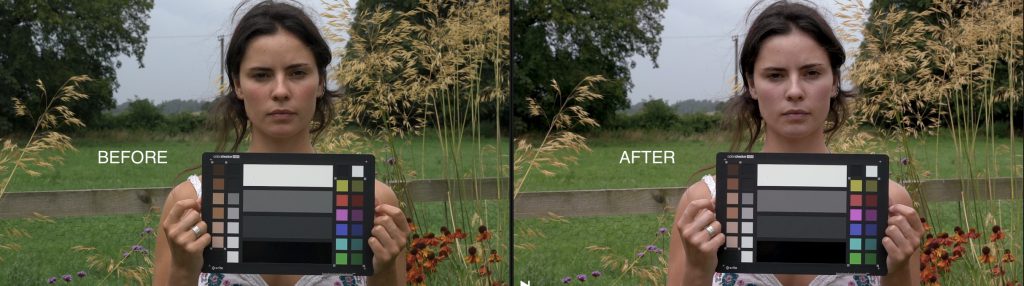
Understanding how to do as much matching as possible in-camera, and leaving the fine tuning for post, is the real skill here. I could have shot both cameras in AWB mode, using different picture profiles (it would have made for a more impressive before/after image) but I also would have spent many times longer in Resolve matching them, and the 8-bit, 4:2:0, A7RII footage would have been stretched to breaking point, resulting in a poor looking image.
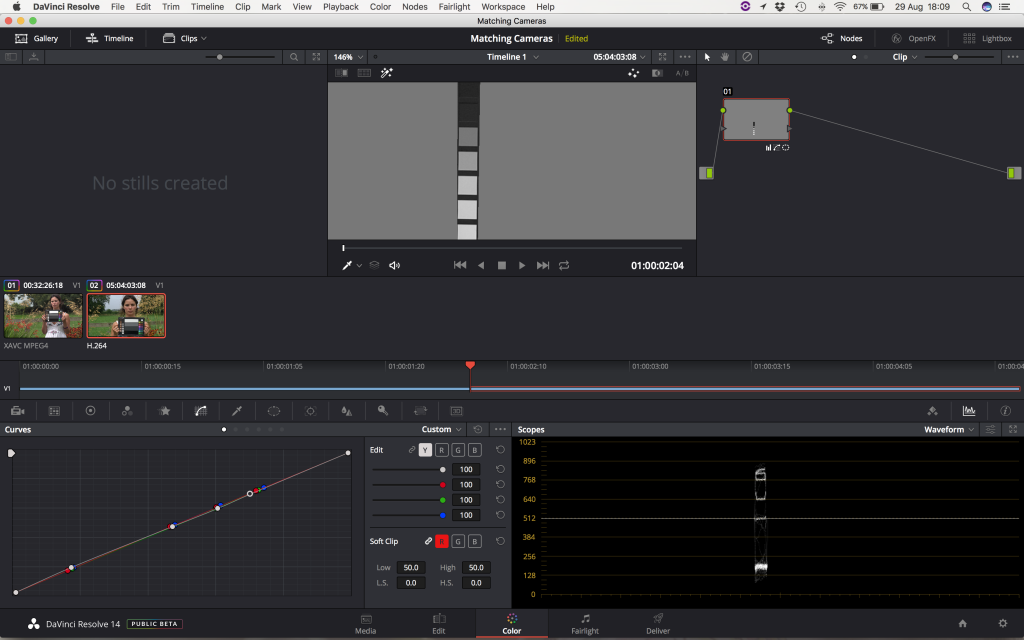
The next stage was to isolate the contrast chips in each clip, using a simple custom power window (mask) in Resolve. By isolating each area of the chart as I need it, I make it infinitely easier to see the information I need in the Waveform monitor. A simple tweak of the Y (luminance) curve allowed me to get the contrast looking the same between each shot.
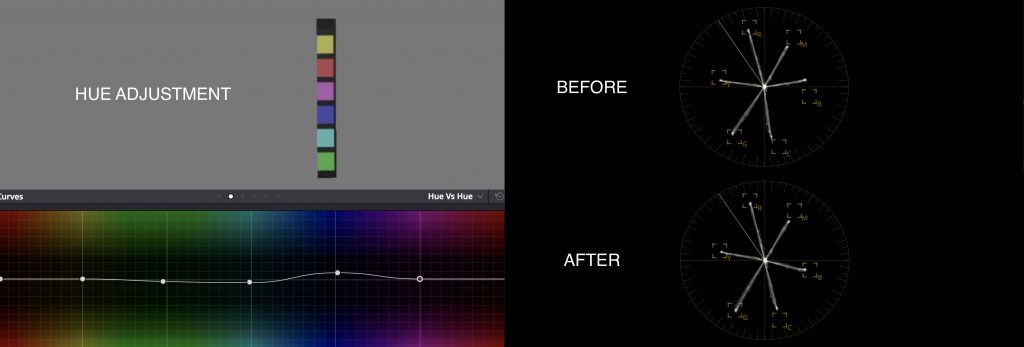
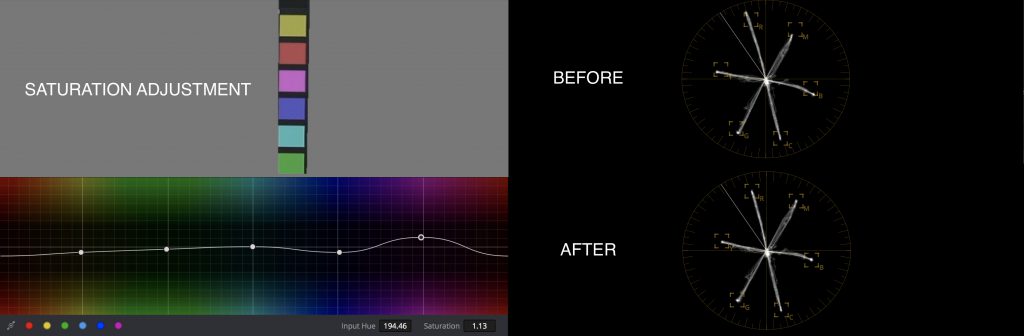
I then used the saturated primary and secondly color chips (in conjunction with the Vectorscope) to align the saturation and color of my two cameras. In the Hue vs Hue and Hue vs Sat controls, there are preset buttons along the bottom that quickly add the appropriate control points along the curve editor. Iʼve seen some people do this but match one wrong camera to another wrong camera. By getting the traces to align correctly in the Vectorscope, I am making both cameras match AND correcting out any discrepancies in their respective signals.
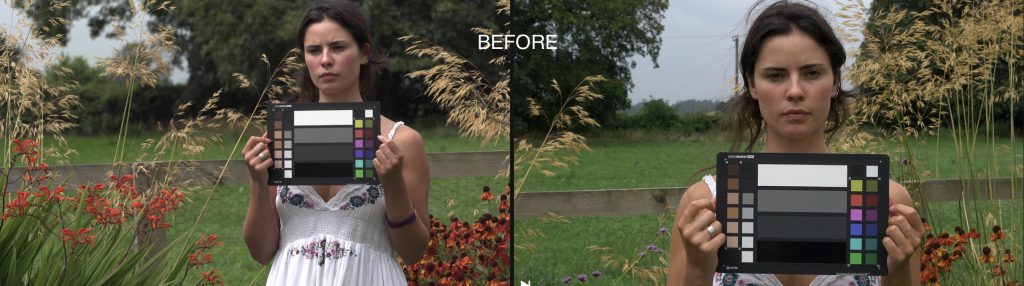
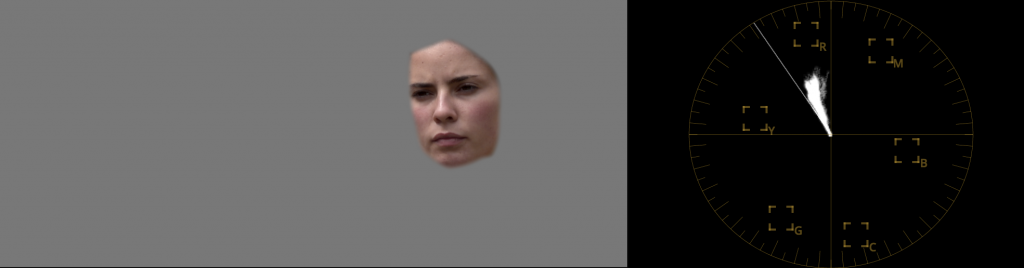
Once you have performed these adjustments, you can then check a few different areas to see if they now match. I usually check three things; the skin tone chips on the two charts, the center of the forehead on any faces, and one other dominant feature in the two frames (in this case the grass). In each case, you can see below that the scopes confirm they match exactly.


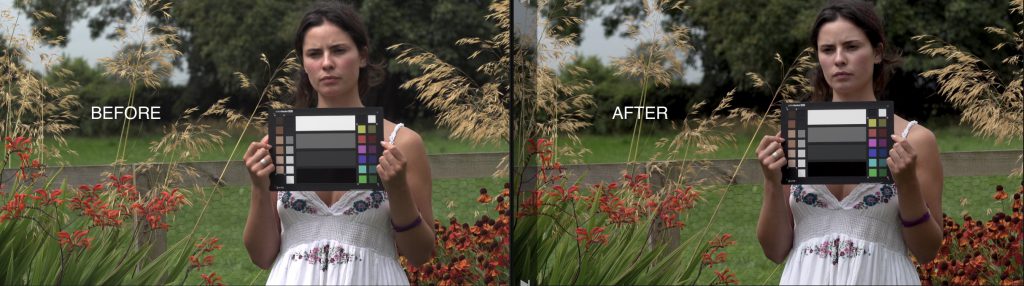
Donʼt forget, this is not about creating the final look you are after. This is a primary adjustment to give you a consistent starting point. Once this is done, you can then create additional nodes (should you wish to) to push in whatever style suits your film.
So there you have it. The key to matching cameras is a deep understanding of how to get the best image in-camera first, recording charts and then a few simple tweaks to hue, saturation, and contrast in post. Easy!
About the Author
Ollie Kenchington is among the most highly qualified and respected film production and post-production trainers in the UK right now. Over the last twelve years, Ollie has taught thousands of aspiring filmmakers as an Apple Certified Master Trainer, Adobe Certified Instructor, and Blackmagic Certified Trainer. Ollie also helps inspire creativity in the filmmaking community as a contributing writer for Cinema5D and FilmConvert and through talks at events with partners such as Sony, Atomos, X-Rite and CVP.
Ollie regularly delivers masterclasses in DaVinci Resolve, Premiere, Final Cut Pro and RED digital cinema cameras at the YouTube Space: London and is the lead tutor and founder of Korro Academy, a prestigious new film academy that is attempting to re-shape the way film is taught in the modern era and help create the next generation of independent filmmakers in the UK.