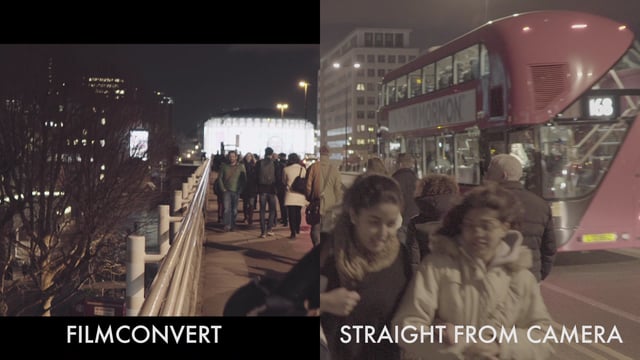
Philip Bloom put together this video review with footage of a recent shoot in London. He compares ungraded footage to footage graded with FilmConvert, and explains his process for creating a look, saving a preset and then applying this across footage from a range of cameras and picture styles.
One of the special properties of FilmConvert is the dedicated camera profiles, that cover a range of industry-leading cameras such as the Panasonic GH4, Sony A7S MKII and up to the RED and Alexa range of professional cinema cameras.
FilmConvert camera profiles are all created by a rigorous scientific process, including shooting standardized test charts and real-world footage at various exposure levels to create a highly accurate representation of how the camera records light and color.
By choosing the correct camera profile for your footage, you can easily match footage shot on different cameras and different profiles, while maintaining the consistency of your original color grade.
Philip Bloom’s Adobe Premiere Pro / FilmConvert workflow
Here’s how Philip Bloom describes his workflow with FilmConvert:
I don’t always shoot on the same camera presets; I do change things based on the situation. So what I do in Premiere Pro is use the plugin and select the camera and camera settings that I use to create the look. I always tweak my look, I will take the base film stock and change things around.
Once I’m happy with that look, I then save it within Premiere as a preset, and for those clips which were shot on a different profile or even a different camera, I simply drag that preset onto those clips and select the camera and camera settings for that actual clip. But it will still maintain that whole look that I created previously.
It’s made matching my shots shot on different cameras and different profiles so much easier.